

At the beginning of October, my second graders really got into helping with the October decorating of the classroom. You know, second graders LOVE, LOVE, LOVE doing those kinds of activities. I am a firm believer that children need time to just have some fun and be creative. And making October spiders has always been a big hit.
A few years ago, I had a principal who forbid us to do anything in the classroom that was not related to the academic standards. We were required to attach the standard to any student work or activity that we posted on the walls or bulletin boards. Can you imagine kindergartners, first graders, second graders, or any grade for that matter, not being allowed to have creative downtime!?
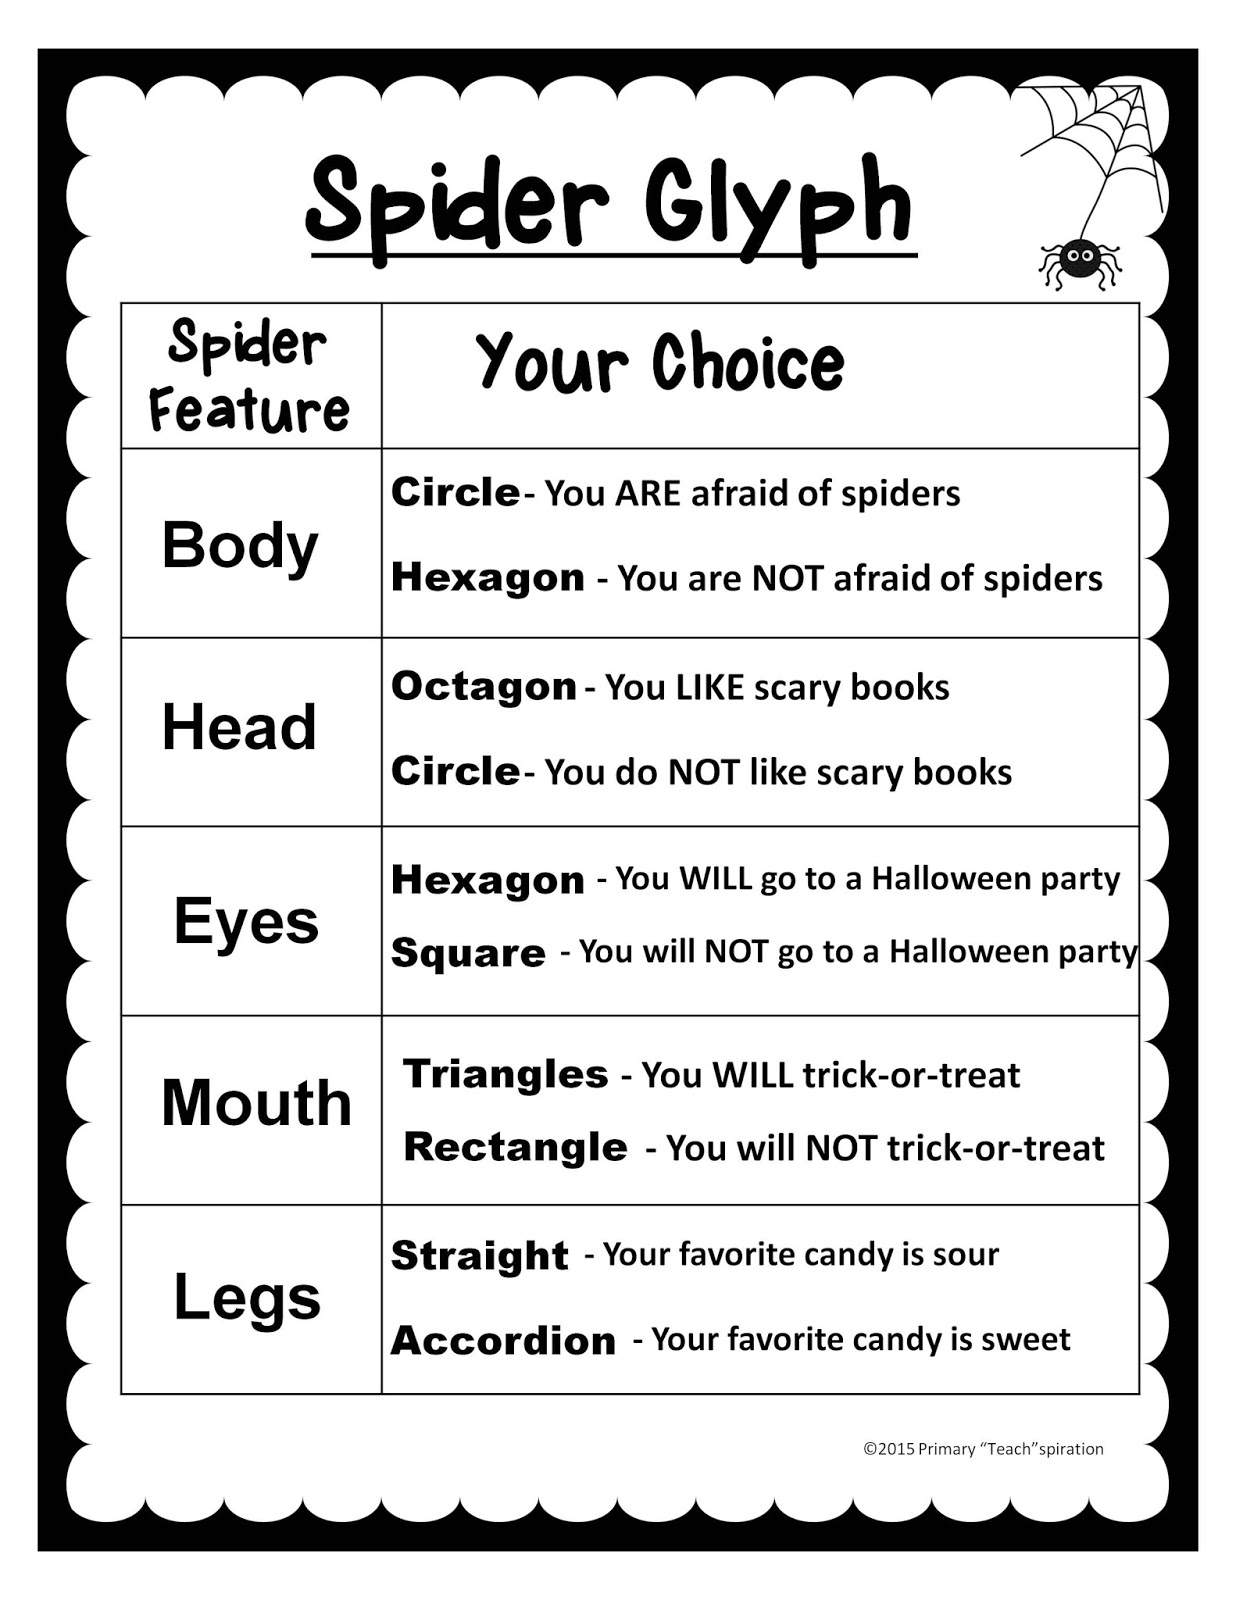
Well, that October, I was not going to keep my second graders from the usual spider craft my class did each year. Sooooo, I changed up the activity a bit to make it a geometry lesson that fit with our geometry standards. Each spider part had a geometric shape. We talked about the shapes, their names, how many sides, and how many angles. The kids had a blast choosing their spider parts and counting the sides and angles before they even began putting their spiders together.
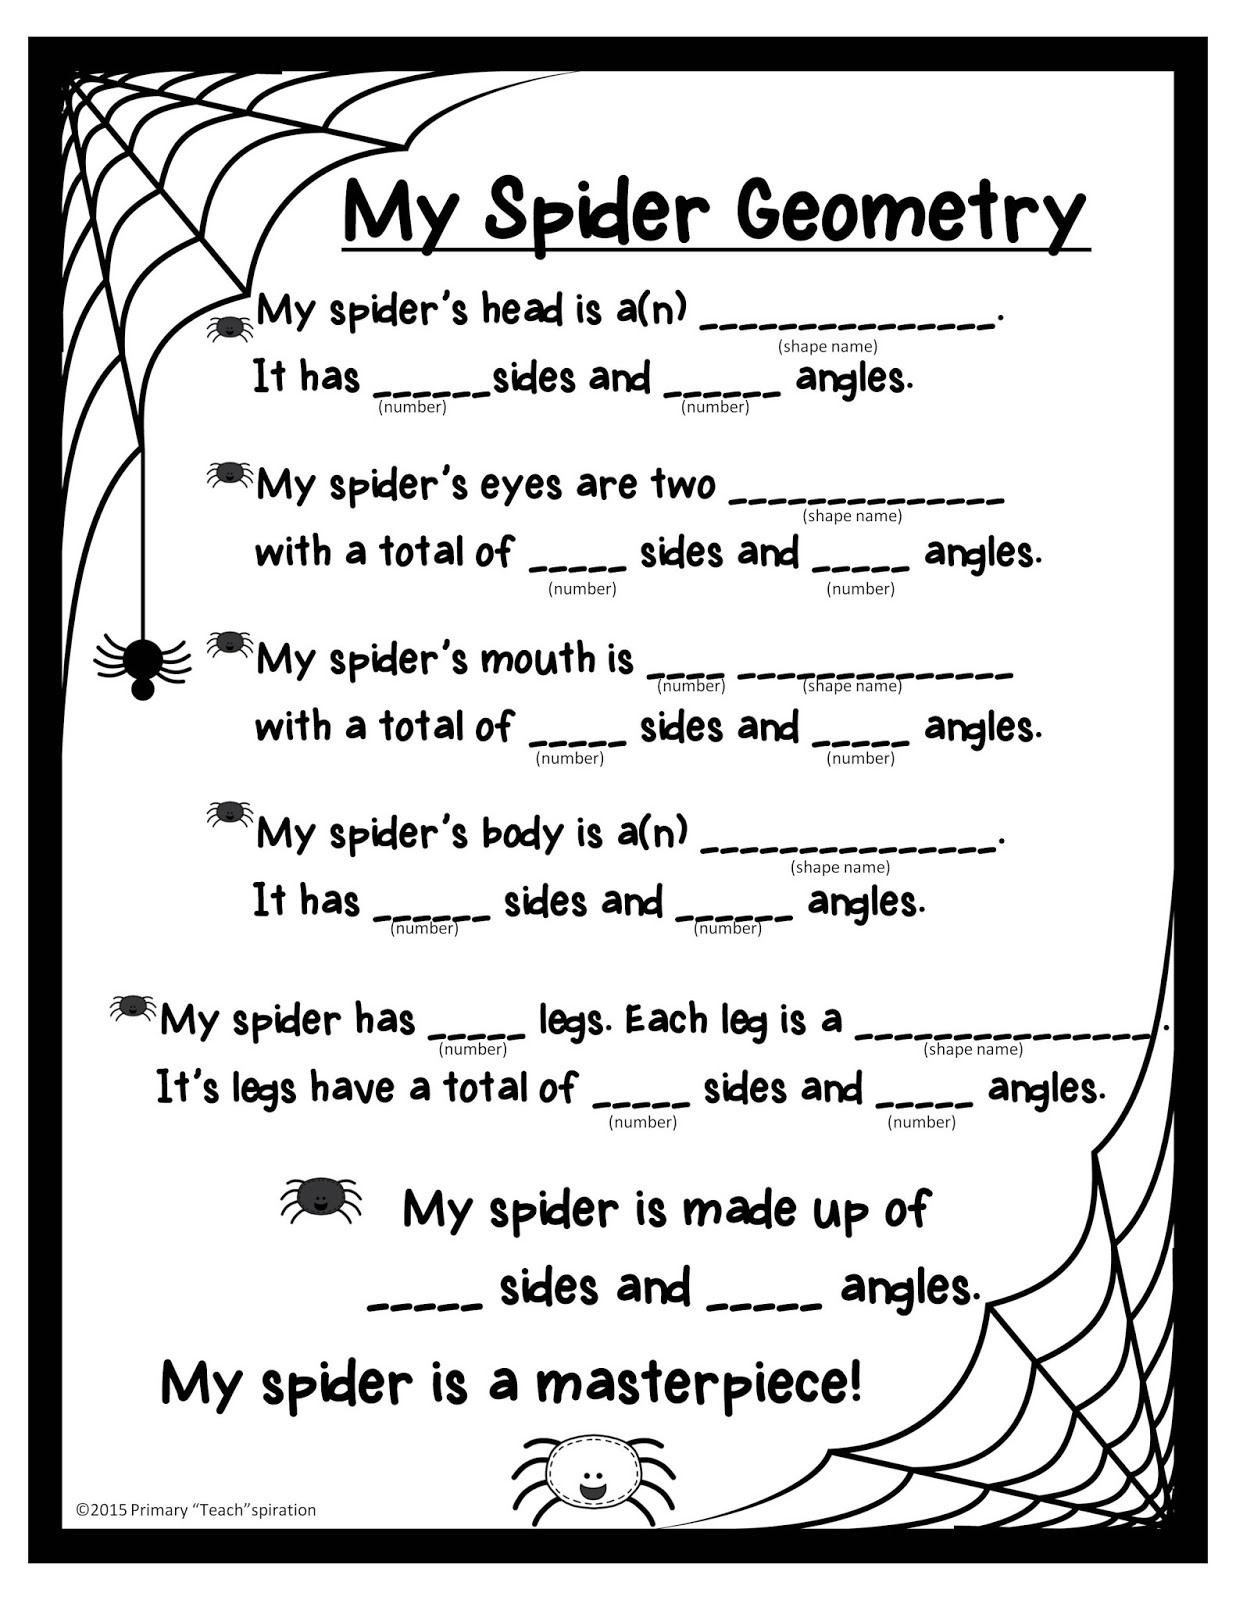
For you, today, I have a Spider Glyph and the spider patterns. I've also included a Spider Geometry page to guide your students in counting the sides and angles of their spiders (this can be a little tough for some, so doing it in small groups will be helpful).
But first, let me show you how we put the spiders together. Again, it may be easier to do it in small groups, so you are more accessible to help.
First, here is the spider glyph that is used to design each student's spider, according to his or her answers.
These are the patterns for building the spiders. I copied all of them, except for eyes and mouth, onto black construction paper, and I could see the pattern lines. If yours does not show up on black, you could make card stock patterns to trace around. Copy the eyes and mouth sheet onto white construction paper.

Two per page.
~~~~~~~~~~~~~~~~~~~~~~~~~~~~~~~~~~~~~~~~~

Two per page.
~~~~~~~~~~~~~~~~~~~~~~~~~~~~~~~~~~~~~~~~~~~

Six per page.
~~~~~~~~~~~~~~~~~~~~~~~~~~~~~~~~~~~~~~~~~~~

Six per page.
~~~~~~~~~~~~~~~~~~~~~~~~~~~~~~~~~~~~~~~~~~~~
Rectangular Legs (straight)

Two sets of 8 per page.
~~~~~~~~~~~~~~~~~~~~~~~~~~~~~~~~~~~~~
Rectangular Legs (Accordion)

One set of 8, plus 2.
~~~~~~~~~~~~~~~~~~~~~~~~~~~~~~~~~~~~~~~~~~~~~~~~
Eyes and Mouth Choices

~~~~~~~~~~~~~~~~~~~~~~~~~~~~~~~~~~~~~~~~~~~~~~~~~
After students have their chosen body parts, they may cut them out and begin building their spiders. Take them through it step-by-step, talking about the shapes and attributes as you go.
Glue the white eyes and mouth onto the head.

Fold the body down the middle on the dotted line, with the two little dots on the outside.

Keep the body folded in half, and use a hole punch on one of the little round dot marks.
This will be holes for the web string to thread through, so you can hang the spiders from the ceiling.

Have white string or yarn cut to about a yard length for each student.
Thread it through the two holes evenly and tie in the middle on the backside of the spider as shown.
You can do this at the very end, if you choose.

Glue the head onto the inside fold of the body, as shown.

Glue four legs on each side of the spider's back.

Tie the two parts of the top of the string together and hang the spiders from the ceiling.


A variety of spiders will be looking down at you and your students all over the classroom!


Glue four legs on each side of the spider's back.

Tie the two parts of the top of the string together and hang the spiders from the ceiling.


Before you hang the spiders, let your students use their spiders to help them complete the Spider Geometry page.
If you would like the Spider glyph, patterns, and geometry page, click HERE to download them.
Happy October!


I love this craftivity! I am always looking for new craft ideas to hang from the ceiling and would love to do this with my class. However, when I click on the download, it is not downloading. Suggestions?
ReplyDeleteThank you for sharing.
Sharon
Did I miss my opportunity to download this perfect resource?! I tried to look on TPT too, but I've been unable to download it.
ReplyDelete