Showing posts with label DIY. Show all posts

Tuesday, October 6, 2015

Cute DIY Pumpkin Cupcake Recipe

Cute DIY fall pumpkin recipe for elementary teachers
Happy October friends! I love making holiday cupcakes for my class parties, and I think these pumpkin cupcakes are so cute. The great news is they are easier than they look. 

You can make them ahead of time, or even make them in class with your students. The recipe works great at an adult supervised center, or can be made with the whole class during a fall or Halloween party. All you need to do is bake the cupcakes ahead of time and bring the rest of the ingredients and let students have fun decorating them. As you can imagine, they love frosting them and adding the sprinkles and stem. 

Whether you decide to make these ahead of time or together with your class, everyone will love eating them. Here's the recipe.

Ingredients
  • a box of cupcake batter
  • cupcake wrappers
  • white frosting
  • yellow and red food coloring
  • orange sprinkles
  • green licorice or candy (optional)
Directions
  1. Make the cupcakes according to the instructions on the box.
  2. Color the frosting orange using a few drops of red and yellow food coloring.
  3. Frost the cupcakes with the orange frosting.
  4. Squirt four lines for pumpkin "ribs" on the cupcake using the frosting.
  5. Cover the frosting in orange sprinkles.
  6. Press a short piece of green licorice (or any green candy) in the center for the stem.
  7. Enjoy these cute cupcakes with your students!
As always, happy teaching!
Image Map

Monday, September 14, 2015

DIY Seating and "Cubbies"

Hey there! Lauren Lynes from Simply Second Grade! Today I am sharing two cheap DIY projects with you that I hope you can use in your classroom!

A few years ago, I started the Daily 5 in my classroom. I had been blog stalking all summer long, looking for ideas for Daily 5. Many classrooms I came across had all kinds of fun, comfortable seating areas for students to read. I wanted to provide some more fun seating options for my kiddos during Daily 5 without breaking the bank. And then one of our 3rd grade teachers gave me this awesome idea! And it only cost about $6 a pop!


I bought a few crates from Wal-Mart for about $3 each. I bought enough padding at Hancock Fabrics for 4 seats ($12). Hancock Fabrics does a teacher discount, FYI! I had some leftover fabric (free!) and my dad had some plywood in his shed (free!). My dad cut the plywood for me, but I found out that Lowe's will cut it to the correct size for free if you buy the wood from them. Have the wood cut so that it can sit inside the basket where you would normally hang folders. Hot glue the padding to the wood. Cover with fabric, and use a staple gun to secure the fabric. And voila! Cheap seating for your babies (or you!) And BONUS! These seats serve as extra storage! I store my kiddos' extra school supplies inside my seats. 

When I got my first classroom, it did not come with cubbies. Those things can be expensive, especially for a brand spanking new teacher! And at the time, I did not know anyone carpenters, and still don't :) So I use cans instead of cubbies! They are the perfect size for papers!


This was a SUPER cheap project for me, and these things have lasted since I started teaching in 2007. I get a lot of compliments on them, too! Ask your cafeteria staff to save the large cans that fruits and veggies come in. Make sure the edges where the cans have been open are not sharp; you don't want cut little fingers! You can put globs of hot glue on the edges if needed. I cut butcher paper to fit the size of the can. I used calendar numbers to number the cans, then I laminated the sheets of paper. I hot glued the laminated sheets at the seam, and bam! A cute, CHEAP way to send your kids' papers home :)

I hope you are able to use these ideas in your classroom!

Sunday, September 13, 2015

DIY Labels for... everything!

Hi everyone!  I'm Angie from Rulin' The Roost and am so excited to be a part of this wonderful blog!  This is my first post so, before I do that, let me tell you about me.  I'm a former first grade teacher (for 11 years!) who is now in Second, for my second year.  I am a BOY mom.  I have three wonderful, BUSY boys ages 9, 5 and 1 year (well, in 2 days he'll be 1!).  {odd fact-all THREE of my boys were born on the 15th of their month!  March, April and September!}  Let see...  I love to bargain shop, create things for the home and classroom.... and I HATE coffee!!!!  Say what?!  I don't know how I get through my days without it, but I do!  ha!


Okay-onto my quick little tutorial for you do create yourself!  Creating labels that look cute and don't get all funky with spacing issues and what not when using word to create it all.

What you need:  Computer (ha!), Word (or a word processing that you use for your labels), PowerPoint or KeyNote (though I'm not as familiar with that), some cute graphics and of course some adorable fonts!

Step 1
Know what your label dimensions are.  Mine were the 1x2 5/8 style.
Open Powerpoint and click on File and go down to Page Setup...


 Change your page size to your label size.  I actually changed mine to 1x 2.5 to make sure it would work perfectly.  Click OK.


Now your slides will be super small, label sized!

Step 2
Add your clip art and arrange your font.  What I LOVE about PP for creating is the ability to manipulate my font and put it anywhere I want.  Word drives me INSANE trying to line up things where I want.


Step 3
You are going to save the slides as pictures.  Go to File, Save As Pictures.  I keep it as it is and save as a JPG.  These will go to a file folder somewhere on your computer.  Mine save to my desktop so I can find them easily.


Step 4
Open up word and get it ready for labels.


Step 5
Open your folder that was just saved with your pictures.  Drag the picture you want into a cell/label.  If you want an entire sheet, copy and paste into each.


Step 6
PRINT and stick!


I hope that this will help you create some cuteness with your labels.  I don't know why it has taken me so long to do it.  {I do need to warn you that they may print pretty s.l.o.w.l.y....  but, they come out beautifully!}  Now I can't wait to find more things to make labels for!  ha!  (I could have been making some cuteness for my kids' stuff for daycare through the years too!  O'well.  Maybe that can help some of you instead!)

Thanks for stopping by!  If you found this useful, I'd love to hear how you use labels in your room and hear how it turned out!


Thursday, September 10, 2015

DIY Keeping Track of Who You've Called on!


Hey hey all! Do you ever feel like you call on the same kiddos over and over all day long!?  I was feeling like that a few years ago.  I felt like I always always always was hearing from the same 4-5 kids all day long.  So I had an idea.

I have my kiddos numbered in alphabetical order, and it makes it SUPER easy to make tools and resources that you can use from year to year when you're writing their NUMBERS on things instead of their names! So, I got some fun colored popsicle sticks (from the crafting aisle at Walmart) and a fun pencil cup from Target Dollar Spot (I'm obsessed with shopping at Target!), and numbered the sticks 1-29, one for each one of my kids!

When we're in class discussion, I would just pull a stick to be able to call on a kiddo at random and call the number I pulled! But STILL I felt like I was picking the SAME STICKS....

SOOOOO I tried to problem solve initially by pulling their stick out of the cup when I called on them so I couldn't pull their number again until I had called on everyone and pulled all of the sticks out of the cup.  But then I left the sticks laying where I laid them for sometimes WEEKS at a time because I'd be all cute and take the cup to the library with us or to the carpet meeting area or to the guided reading table....  I LEFT THE STICKS EVERYWHERE!! I would ALWAYS forget to scoop them up and then {crap} their stick wasn't even in the cup to pull the next time!!

SOOOOOOOOO then I saw this GENIUS idea to use WASHI tape {and who doesn't need a good excuse to use washi tape?!?} from Michelle Griffo at Apples and ABCs.


I put washi tape wrapped around the end of the stick that had their number on it.  I start with all of the sticks washi tape DOWN and then as I pull those sticks and call on those students, I put the stick back in with the number and washi tape side UP! That way I know who I've already called on and their STICK STAYS SAFE IN THE CUP! :) 

EASY PEASY! And a FUN and colorful DIY!! Do you have a fun and creative way to keep track of who you've called on?!? I'd love to hear about it in the comments! Thanks for reading!!


Wednesday, September 9, 2015

DIY Crayon-Style Pencil Holder

Cute DIY crayon-style pencil holder for teachers
Hello colleagues! We hope your school year is off to a great start. Here in Yucatan, our kids just went back to school on the last day of August. If you started earlier, don't be jealous though, because we'll pay for it later when we get out of school in mid July! 

Today we're blogging to share a fun and easy DIY project with you all. Eliceo and I love making crafty teacher stuff and this is one of our latest creations. It's super simple to make and only requires a few supplies. All you'll need are some cans, crayons, and craft glue (hot glue will melt the crayons). Then all you do is glue the crayons around the can. You can arrange them like a rainbow, or make a fun pattern with the colors. You could also tie a ribbon around them for added cuteness. Then we put it on our desks to hold all our writing tools. These would make a great gift for your colleagues, or even your secretary. If you're planning to make a bunch of them, make sure to stock up on crayons in the fall during the back to school deals. We hope you enjoy it. As always, happy teaching! 
Image Map

Thursday, September 3, 2015

Fern Smith's Tip For Using Duct Tape To Make Mini-Books Last Longer

 Fern Smith's Classroom Ideas Duct Tape for Making Mini-Books Last Longer
Making Mini-Books Last Longer for Mini-Fingers!
Hello everyone, Fern from Fern Smith's Classroom Ideas here again!  Just a quick little tip for the start of school and your PRINTED mini-books and mini-readers.
I like to use duck tape to reinforce the side binder OVER the staples.
Four Reasons:
1. It keeps the book together longer.
2. The BACK page is not as quick to rip off.
3. Little people don't start crying when little fingers get snagged on the back part of the staple! Oh the drama!
4. Teacher stays happy! :)
Fern Smith's Classroom Ideas Duct Tape for Making Mini-Books Last Longer
Guided Reading Groups and Fluency
You can also print 6 to 8 of the same mini-books to make sets to use again and again during your guided reading instruction. The students can use the books with white boards and white board markers. Use one color of duct tape for the binding to keep all the same titles of a book easy to find and organized. 
Click here for my mini-books.

Fern Smith's Classroom Ideas Freebies at Owl-ways Be Inspired
Have a great day friends!
Fern Smith's Classroom Ideas ~ Teacher Tips, Tricks, Resources and Freebies to make teachers' lives easier!
 Follow Fern Smith's Classroom Ideas on TeachersPayTeachers ~ TPT  Follow Fern Smith's Classroom Ideas on InstagramFollow Fern Smith's Classroom Ideas on Pinterest Follow Fern Smith's Classroom Ideas on Bloglovin

Friday, July 24, 2015

First Day Fun with Playdough!

Happy Friday everyone! It's Lisa from over at Second Grade Stories. Are you thinking about your first day of school? (I know just a few of you have already HAD your first day of school!) The first day of school is an important and exciting day for teachers AND students!  We get to know our kids for the first time and our students get to know us - and the other students whom they'll be spending the year with.

In my school, everyone meets in the gym the first morning, and we all come upstairs together as a class on the first day.  I love starting the year meeting altogether with the whole school, but it means ALL my kiddos come in AT THE SAME TIME on the first day - and that means notes and backpacks and lunches and "My Mom said to give this to you" and "I have 4 folders, want to see?" Some of my kiddos are too anxious and worried to even say anything!  I want to start the first day with an activity that EVERY student can be successful at, one with no worries about being able to "get it right" - an activity that most, if not all of my kiddos have already done, and an activity that will give ME some time to handle everything that needs to be done before the day starts.  My answer? Playdough!
(Confession:  I am not at home.  I do not have a printer, camera other than my phone, even ziploc bags! I apologize for the quality of any of the pictures I DO post here, and for the lack of others that would make this post better.. like one here showing the playdough on their desks on the first day.. I'm sure I have a picture somewhere in my files at home...sigh... summer.. :-)

When we come back to the room  on the first day, I have my students go directly to their seats and just plunk all their stuff on the floor next to them.  DO NOT TAKE ANYTHING OUT!  This usually works fine because there is a ball of playdough on a paper plate at their seat for them to play with and they are immediately distracted and start to have fun.  This gives me the chance to walk around to each table, gather important notes, organize school supplies, and most importantly - chat with each student briefly in a nonthreatening way.  I really do learn a lot about each kiddo in that first conversation. I ask them about what they're making, how they created it... give encouragement if anyone is feeling frustrated because they can't make what they want, etc. I have never had a student refuse to play with the playdough.  And in addition to feeling a little more relaxed that first morning, the playdough lends itself to conversation with others at their table - even if they don't really know them.  I have seen friendships form over those balls of dough that last the whole year!

After all the organizational pieces for the day have been taken care of, I ask students to show me some specific things with their playdough. Can you make your name? Roll 1 ball for each person in your family.  What's your favorite animal?  These questions let me know even more about my kiddos.  By the end of the first 20-30 minutes, I have had a one-on-one conversation with each child, watched them interact with others, checked out some fine motor skills and spatial planning, and gotten to know a little about everyone.  Now I call that a successful beginning of the day!

Want to know a secret for making brightly colored playdough that smells great?
Koolaid!  Yep, that's right.  I have made soo many different kinds of playdough over the years and this is the recipe I love the best.  It's easy and the kool-aid makes the colors really bright, and it smells so good!  Here's the recipe I use.
I make 3 different color recipes and that's plenty for 20 kids.

To keep the fun going, I make take-home bags of playdough for each student.  I include the dry ingredients and the directions.  (The recipe I send home is slightly different than the one I use for the whole class.) I bag everything up and add a cute tag and send it home on the first day!
I keep the playdough out as our "morning work" each day that week.  Students know they come into the room, take care of what they need to do, and then get some playdough to work with.  It's a great way to start each morning the first week!

I put everything I use into a freebie you can download if you'd like to use it in your classroom. Just click the image below to download.

Try it!  You can do the activity at a different time during the first day, or any time at the beginning of school.  Happy back to school!

Thursday, July 23, 2015

Save Some Paper! - Lauren Lynes

Hi friends! Lauren Lynes here from Simply Second Grade! I am here to share two quick tips that have helped save me a little bit of PAPER!

If you are like me, you write about a bazillion to-do lists throughout the week, and I seem to find them everywhere! I was tired of 1.) having paper all over the place, 2.) wasting paper, and 3.) spending lots of money on notepads! So I went to Ikea, got a cheap frame, and printed out a blank to-do list. I just stuck it in the frame, and now I write my to-do list with an Expo marker! As I complete a task, I just erase it, and replace it with something else I need to do :)


Have you seen these dry erase pockets at your Target Dollar Spot this year yet? I haven't, but I keep looking! If you find some, snatch 'em up! You won't be sorry!


You can use them for ANYTHING! I use them during small group time, for RTI, word work, handwriting practice, etc. I keep a few with my math tub activities, and will put pages that go along with whatever skill we are working on, and the kids will do them for one of their rotations. I also put timed tests in there, and the kids can time themselves to practice their math fact fluency! The kids bring them to me to spot check, and I am able to give pretty instant feedback. Then I just switch them out when needed. The kids think it is so cool to use the dry erase markers, and don't feel like they are doing a worksheet! 

I also use them during Listen to Reading during our Daily 5 rotations. I put Reader's Response sheets in them and the kids have to fill them out about the book they listened to. I have a variety of response sheets, so I switch them out regularly. It holds the students accountable for actually listening to and/or reading the book. After they're done, they just bring me the pocket, I check it in about 5 seconds, and we are done! I can conference with students if it seems like there was an area they struggled with. 


The possibilities for these pockets are endless, and I always end up buying several whenever I see them! I hope these quick tips can help you in your classroom, and save you a bit of paper :)

Sunday, July 19, 2015

Back to School with Shelly

Hello everyone!  This is Shelly from Smiling and Shining in Second Grade.  I am slowly starting to prepare things for my classroom even though it is summer.  On the first day of school,  I like to give my students a little snack. I need to run to the store for some ribbon and plastic bags to finish them. The adorable tags are from Primarily Speaking.

I am busy creating dice games for my math center.  The cute clip art is from Creative Clips.


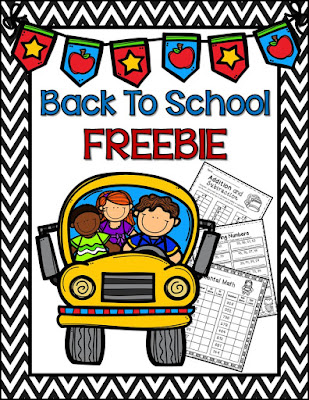
I created some math worksheets that you can use with your students the first month of school.  Click on the picture of the Back to School Freebie for your copy.

Back to School Math

 Here are a few sample pages in the Back to School Freebie.

Math for 2nd grade

Math for 2nd grade

Have you started preparing for back to school?

Thursday, June 25, 2015

Do You Have a "Teacher Stash?"

Hi there folks!  It's Lisa again, from Second Grade Stories.  Well, it's the first week of summer vacation for me and I am just getting used to sleeping a little later, actually enjoying my lunch and getting to use the bathroom whenever I need to! Ahhh, summer.... :-)

I'm here today with  a little Tipster Thursday hint to keep you prepared for any little emergency you might encounter in the classroom. As I was cleaning out my file cabinet drawers at the end of the year, I pulled out this happy helper.


This is my "Teacher Stash."  It is FILLED with everything I might need at some point during the year - and it has saved me on more than one occasion! Let's look inside, shall we?

First, we have our :personal" items - toothpaste, toothbrush, floss, deodorant, female needs (not in the picture :-).  Perfect for Open House, evening events or just when you need them! (I may or may not have left the house and forgotten to brush my teeth more than once . . .)


Next up is the medicine cabinet.  I am KNOWN for having every possible medicine you could need: Tylenol, ibuprofen, cold medicine, Advil, Pepto, Immodium, Tums ... you just never know!


Here we have the wardrobe malfunction helpers - fashion tape (I LOVE this stuff!), safety pins...
A few grooming items - brush/comb, hairspray, elastics/scrunchies, stain remover, wrinkle remover...
Some random items . . . chapstick, mints, hand sanitizer (band aids are in my desk drawer), REAL kleenex...


And finally, the "you just never know!" items - underwear, pantyhose/socks, extra shoes... (These are in a bag in my closet at school.  ALL of them have been needed!)

Honestly, looking at all this I could probably live in my classroom for a week!  But every one of these items has come in handy at some point - and I was SOOOO glad I had it! I've also helped friends out of a jam with this stash, too.

Do you have a teacher stash of necessities in your room?  Grab a few travel items as you're out shopping this summer and put everything into a container so you have it in your room. You can even put it in a nice cute container.  I use the plastic bag because it fits in my file cabinet better. Trust me, you'll thank me later!