Showing posts with label classroom set up. Show all posts

Saturday, September 26, 2015

Under the Sea Classroom

Welcome everyone! This is Lori Flaglor giving you a sneak peek inside my Under the Sea Classroom theme. I totally redecorated my classroom to correlate with our school reading theme of "Dive Into Reading."
 If you like the Back to School Poster I am holding and the Inspirational Quotes you can find the FREE links at the bottom of this blog post.
  I've never decorated my classroom with a theme before, but this year I totally got swept away with the idea. 

  I first began with my large bulletin board in the back of the room. I used different colored scrapbook paper for the letters and cut them out using the Ellison machine. I used streamers and twisted them to look like seaweed. I then used these awesome genre posters from Kelly Knighton. I love the posters because they are so colorful and have cute graphics.   Click here to check out Kelly's store for these genre posters.

  I made this Fin-tastic board to hang student's work. I used clothespins and attached sea creatures to clip the papers onto the board. You can't see it, but I hung matching scrapbook paper under the student papers. I love how easy it is to change the papers and I can leave the board up all year long.
 Next, I decorated my door and it says, "Splashing into Second Grade." Shhh, don't tell the fire inspector my door is decorated!

 My class made these super cute posters and hung them outside our classroom to display for Open House.
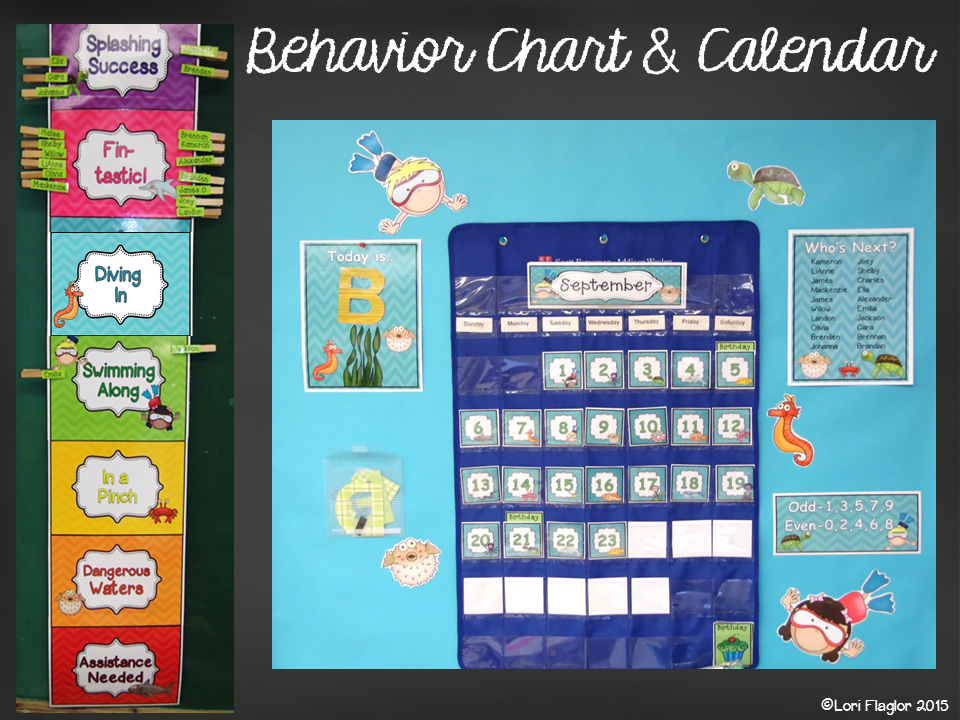
 I carried the Under the Sea theme and made a behavior chart and new calendar pieces. I love the bright colors in my behavior chart.

 Here's a closeup of my Alphabet Chart. I have it hung above my board. Here are my desk tags and special schedule cards. 
I am just thrilled with my new classroom! I'm sure the reading department will have a new theme next year, but I'm sticking with this one for awhile. 

Hope you have a Splashing Year in Second!


Click here for the FREE Printable First Day of School Sign.

Click here for FREE Inspirational Posters.


Sunday, September 13, 2015

DIY Labels for... everything!

Hi everyone!  I'm Angie from Rulin' The Roost and am so excited to be a part of this wonderful blog!  This is my first post so, before I do that, let me tell you about me.  I'm a former first grade teacher (for 11 years!) who is now in Second, for my second year.  I am a BOY mom.  I have three wonderful, BUSY boys ages 9, 5 and 1 year (well, in 2 days he'll be 1!).  {odd fact-all THREE of my boys were born on the 15th of their month!  March, April and September!}  Let see...  I love to bargain shop, create things for the home and classroom.... and I HATE coffee!!!!  Say what?!  I don't know how I get through my days without it, but I do!  ha!


Okay-onto my quick little tutorial for you do create yourself!  Creating labels that look cute and don't get all funky with spacing issues and what not when using word to create it all.

What you need:  Computer (ha!), Word (or a word processing that you use for your labels), PowerPoint or KeyNote (though I'm not as familiar with that), some cute graphics and of course some adorable fonts!

Step 1
Know what your label dimensions are.  Mine were the 1x2 5/8 style.
Open Powerpoint and click on File and go down to Page Setup...


 Change your page size to your label size.  I actually changed mine to 1x 2.5 to make sure it would work perfectly.  Click OK.


Now your slides will be super small, label sized!

Step 2
Add your clip art and arrange your font.  What I LOVE about PP for creating is the ability to manipulate my font and put it anywhere I want.  Word drives me INSANE trying to line up things where I want.


Step 3
You are going to save the slides as pictures.  Go to File, Save As Pictures.  I keep it as it is and save as a JPG.  These will go to a file folder somewhere on your computer.  Mine save to my desktop so I can find them easily.


Step 4
Open up word and get it ready for labels.


Step 5
Open your folder that was just saved with your pictures.  Drag the picture you want into a cell/label.  If you want an entire sheet, copy and paste into each.


Step 6
PRINT and stick!


I hope that this will help you create some cuteness with your labels.  I don't know why it has taken me so long to do it.  {I do need to warn you that they may print pretty s.l.o.w.l.y....  but, they come out beautifully!}  Now I can't wait to find more things to make labels for!  ha!  (I could have been making some cuteness for my kids' stuff for daycare through the years too!  O'well.  Maybe that can help some of you instead!)

Thanks for stopping by!  If you found this useful, I'd love to hear how you use labels in your room and hear how it turned out!